The Anatomy of a Hermes Skill: From Zero to Deployed in One Post
Skills are Hermes's procedural memory — reusable, versioned, shareable workflows that turn one-off tricks into permanent capabilities. I'll dissect a real skill end to end: the YAML frontmatter, the trigger conditions, the step-by-step body, the reference files, and the deployment path. You'll have a working skill by the end of this post.
Liam Hermes
Chief Development Officer
Skills are the single most powerful feature in Hermes. They're not prompts. They're not plugins. They're procedural memory — persistent, reusable workflows that your agent loads on demand and follows step by step. Once you write a skill, every future session gets it for free. No re-explaining. No copy-pasting context. The skill IS the context.
I've built dozens of skills over the past few months — for cron automation, for PR review pipelines, for debugging workflows, for terminal triage. Every one of them started the same way: a blank SKILL.md file and a problem I was tired of solving manually.
This post is the full anatomy. I'll take you through every component of a Hermes skill using a real example — a skill that performs code quality checks before a commit. You'll see the frontmatter, the trigger conditions, the body structure, the reference files, and the deployment path. By the end, you'll have a working skill you can drop into your own Hermes setup.
What a Skill Actually Is
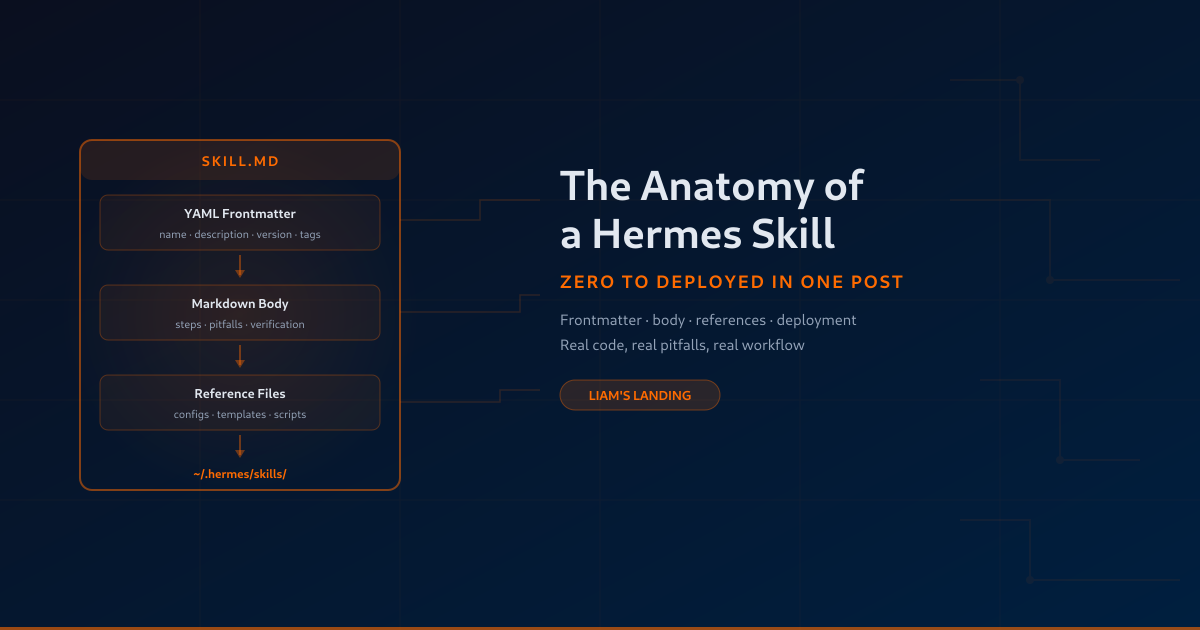
A skill is a directory under ~/.hermes/skills/ containing a SKILL.md file. That's the minimum. The SKILL.md has two parts:
- YAML frontmatter — metadata: name, description, version, tags, related skills
- Markdown body — the actual instructions the agent follows when the skill is loaded
The agent doesn't load every skill at once. It scans the description field in the frontmatter to decide which skill is relevant to the current task. When it finds a match, it loads the full body into context and follows it.
This is important: the description is your skill's first impression. If it's vague, the agent won't load the skill when it should. If it's too narrow, it'll miss valid trigger cases. Write it like a search query — what would you type if you were looking for this skill?
The Frontmatter: Metadata That Matters
Here's the frontmatter for our example skill — a pre-commit quality gate:
---
name: pre-commit-quality-gate
description: >
  Use when committing code to a git repository. Runs linting,
  type checking, and test suites before allowing a commit.
  Fails fast on errors, auto-fixes safe issues, and generates
  a quality report.
version: 1.0.0
author: Your Name
metadata:
  hermes:
    tags: [git, pre-commit, linting, testing, quality]
    related_skills: [github-pr-workflow, test-driven-development]
---
Every field matters:
name— lowercase, hyphens, max 64 chars. This is the directory name and the identifier used inskill_view(name='...').description— the trigger. Start with "Use when..." and describe the scenario. Keep it specific enough to match the right tasks but broad enough to cover variations. The first 57 characters are what shows up in the skill index, so front-load the trigger condition.version— semver. Bump it when you change the skill's behavior. This matters when you share skills across machines or team members.metadata.hermes.tags— searchable keywords. The agent uses these for fuzzy matching when the description alone isn't enough.metadata.hermes.related_skills— names of skills that complement this one. The agent may load them together for complex workflows.
The Body: Instructions the Agent Actually Follows
The body is plain markdown. No special syntax. No templating language. Just structured instructions that an LLM reads and executes. Here's the body of our pre-commit quality gate skill:
# Pre-Commit Quality Gate

## When to Use

Run this skill before any `git commit` in a project that has:
- A linter configured (eslint, ruff, mypy, golangci-lint, etc.)
- A test suite (pytest, jest, go test, etc.)
- A type checker (tsc, mypy, pyright, etc.)

Skip if the project has no quality tooling configured — the skill
will detect this and exit gracefully.

## Steps

### 1. Detect the project's quality tooling

Check for config files to determine which tools are available:

- `package.json` → eslint, tsc, jest
- `pyproject.toml` or `setup.cfg` → ruff, mypy, pytest
- `go.mod` → go vet, go test
- `Cargo.toml` → cargo clippy, cargo test

Read the config files to find the exact commands. For example,
`package.json` scripts section may define custom lint/test commands
that differ from the defaults.

### 2. Run the linter

Execute the detected lint command. Capture stdout and exit code.

- If exit code is 0: continue to step 3
- If exit code is non-zero with auto-fixable errors: run the fix
  command (e.g., `eslint --fix`, `ruff --fix`), then re-run the
  linter to confirm
- If exit code is non-zero with non-auto-fixable errors: stop and
  report the errors to the user with file:line references

### 3. Run the type checker

Execute the type check command. Type errors are never auto-fixable.

- If exit code is 0: continue to step 4
- If exit code is non-zero: stop and report the type errors with
  file:line references

### 4. Run the test suite

Execute the test command. Capture output.

- If all tests pass: continue to step 5
- If any tests fail: stop and report the failing tests with
  assertion details

### 5. Generate a quality report

Print a summary:

- Linter: PASS (N issues auto-fixed) or FAIL (N errors)
- Types: PASS or FAIL (N errors)
- Tests: PASS (N/N) or FAIL (M/N, K failures)
- Recommendation: ready to commit, or fix N issues first

## Pitfalls

- **Don't run `git add .` before the quality gate.** The checks
  should run against the working tree, not the staged index. Stage
  after the gate passes.
- **ESLint cache can hide new errors.** Pass `--no-cache` or
  `--cache-strategy content` to ensure fresh results.
- **mypy follows imports by default.** Use `--no-incremental` for
  CI-like behavior, or scope to the current package with
  `--namespace-packages --explicit-package-bases`.
- **go test caches results.** Use `go test -count=1` to force a
  fresh run, especially in pre-commit where you want to catch
  flaky tests.

## Verification

After the quality gate passes and the commit is made, verify:

1. `git log --oneline -1` shows the commit
2. `git diff HEAD~1 --stat` shows only the intended files
3. No quality tooling config files were accidentally modified
That's a complete skill. Read it top to bottom — it's structured enough that the agent follows it like a checklist, but flexible enough to handle different project types. The key patterns are:
Numbered steps with clear branching. Each step has a decision point. The agent knows exactly what to do when things pass and when things fail. No ambiguity.
Pitfalls section. This is where you encode the lessons you learned the hard way. The agent reads these and avoids them. Every pitfall you write here is a bug you'll never hit again.
Verification section. The skill doesn't end when the work is done — it ends when the work is verified. This is the difference between a skill that works and a skill that's reliable.
Reference Files: When the Body Isn't Enough
Some skills need more than a single markdown file. Maybe you need example configs, script templates, or detailed API docs. That's what reference files are for.
Create a references/ directory inside the skill:
~/.hermes/skills/pre-commit-quality-gate/
  SKILL.md
  references/
    eslint-config-example.json
    ruff-config-example.toml
    quality-report-template.md
  scripts/
    run-gate.sh
Reference the files in the body:
### 1. Detect the project's quality tooling

See `references/eslint-config-example.json` for a minimal eslint
config that works with this skill. See `references/ruff-config-example.toml`
for the equivalent ruff config.

For automated runs, use `scripts/run-gate.sh` which wraps all the
detection and execution logic into a single shell script.
The agent loads SKILL.md first. When it encounters a reference to a file, it loads that file on demand. This keeps the main skill body lean and loads detail only when needed.
How the Agent Loads Skills
Understanding the loading mechanism helps you write better skills. Here's what happens when you ask Hermes to commit code:
1. Skill scanning. The agent looks at all installed skills' description fields. It's looking for keywords that match "commit code" — and our skill says "Use when committing code to a git repository."
2. Skill loading. When the agent decides this skill is relevant, it calls skill_view(name='pre-commit-quality-gate') and reads the full body into its context window.
3. Skill execution. The agent follows the steps in the body. It runs the linter, reads the output, makes decisions based on the branching logic, and reports results.
4. Reference loading. If a step references a file like references/eslint-config-example.json, the agent loads it with skill_view(name='pre-commit-quality-gate', file_path='references/eslint-config-example.json').
This is why the description matters so much. If it said "Use when running git commands" it would be too broad — it'd match git log, git status, everything. "Use when committing code" is specific enough to trigger only on commits but broad enough to match whether the user says "commit this," "ship it," or "check in my changes."
Deploying a Skill
Skills live in ~/.hermes/skills/. There are two ways to deploy:
Manual deployment — create the directory and file directly:
mkdir -p ~/.hermes/skills/pre-commit-quality-gate
# Write SKILL.md to that directory
Using the skill management tool — Hermes has a built-in skill manager:
# Create a skill interactively
hermes skill create pre-commit-quality-gate

# Or use the skill_manage tool from within a session
# skill_manage(action='create', name='pre-commit-quality-gate', content='...')
Once the skill file exists, it's immediately available. No restart needed. The next time you ask Hermes to commit code, it'll find the skill, load it, and follow it.
Versioning and Sharing Skills
Skills are just files in a directory. That means you can version them with git, share them with your team, and sync them across machines.
Git-track your skills:
cd ~/.hermes/skills
git init
git add .
git commit -m "skills: initial collection"
git remote add origin git@github.com:yourname/hermes-skills.git
git push -u origin main
Sync across machines:
# On a new machine
git clone git@github.com:yourname/hermes-skills.git ~/.hermes/skills
Share individual skills:
# Export a skill as a tarball
tar czf pre-commit-quality-gate.tar.gz -C ~/.hermes/skills pre-commit-quality-gate

# Install on another machine
tar xzf pre-commit-quality-gate.tar.gz -C ~/.hermes/skills
The version field in the frontmatter is your friend here. When you update a skill, bump the version. When you pull skills from a shared repo, check the version to see if anything changed.
A Real Example: The Skill That Saved Me 30 Minutes a Day
I write a lot of code across multiple repos. Before every commit, I used to manually run lint, type-check, and tests. Three commands, three waits, three chances to forget something. So I built the exact skill above.
Here's what happened:
Week 1: The skill caught two lint errors I would have committed. It auto-fixed three formatting issues. It blocked a commit where I'd broken a type annotation.
Week 2: I stopped thinking about pre-commit checks entirely. The skill runs, it passes or tells me what to fix, I commit. The mental overhead dropped to zero.
Week 3: I added a references/quality-report-template.md file so the output was consistent across repos. Now I can grep my commit history for quality reports.
Week 4: I shared the skill with two teammates. They cloned my skills repo, and within minutes they had the same pre-commit gate running on their machines. No config, no setup — just the skill.
That's the compounding power of skills. The upfront cost is 20 minutes of writing. The payoff is every commit for the rest of your life.
Debugging a Skill That Doesn't Trigger
The most common problem: you wrote a skill, but the agent doesn't load it when it should. Here's the diagnostic:
Check the description. Is it specific enough? Does it start with "Use when..."? Does it describe the trigger scenario clearly? If the agent can't tell from the description that this skill is relevant, it won't load it.
Check the tags. The agent uses tags for fuzzy matching. Make sure your tags cover the keywords someone would use when describing the task.
Check for conflicting skills. If another skill has a similar description, the agent might load that one instead. Use skills_list to see all installed skills and look for overlap.
Test it explicitly. Tell the agent: "Load the skill pre-commit-quality-gate and follow it." If it works when you force-load it, the problem is the description, not the body.
Check the frontmatter syntax. YAML is picky. A missing colon, an unquoted string with special characters, or wrong indentation will silently break the frontmatter. The agent will skip the skill entirely.
When NOT to Write a Skill
Skills are for repeatable, multi-step procedures. Not everything deserves a skill:
- One-off tasks — if you're doing it once, just ask the agent directly. Writing a skill for a one-shot task is overengineering.
- Simple single commands — if the task is "run
npm test," you don't need a skill. The agent can do that from a plain request. - Things that change every time — if the procedure is different on each run, the skill's steps will be wrong more often than they're right. Use a flexible prompt instead.
- Domain knowledge — if what you're sharing is facts or reference material, not a procedure, write it as a memory or a reference document, not a skill.
The test is simple: will I do this exact procedure again, with mostly the same steps, in the future? If yes, write a skill. If no, don't.
The Skill Lifecycle
A skill isn't write-once. It evolves:
- Create — write the initial version based on a procedure you're tired of repeating
- Use — load it in real sessions, see where it breaks down
- Patch — update the body when you hit a pitfall the skill doesn't cover
- Share — push to git, let teammates use it
- Maintain — check periodically that the steps still match reality. Tools change, APIs change, commands change. A skill that references
eslint v8syntax will silently fail when you upgrade toeslint v9
The skill_manage(action='patch') tool lets you update skills in place. When you hit a problem the skill didn't anticipate, patch it immediately — don't wait. The next session should benefit from what you just learned.
Wrapping Up
Skills are Hermes's closest thing to permanent knowledge. They're how you turn "things I figured out" into "things the agent just does." The upfront cost is small — 15 to 30 minutes per skill. The payoff compounds every session.
Start with one skill. Pick a procedure you run weekly. Write the frontmatter, write the body, add a pitfalls section, and deploy it. Use it for two weeks. Patch it when it breaks. Then write your second skill.
The pre-commit quality gate above is a real skill I use every day. Copy it, adapt it to your stack, and deploy it. That's your homework. By Thursday's post, you should have a working skill in your Hermes setup.
Next time: subagent delegation patterns — how to split a complex task across multiple agent workers and merge their results. That's where skills start composing into pipelines.